Tuesday, March 28, 2017

10 Summertime Uses for Reclaimed Bricks

10 Summertime Uses for Reclaimed Bricks

It's that time again - spring is in full swing and that means it is time to DIY ourselves all the way to summertime! Here are 10 fun ways to use VintageBricks.com authentic reclaimed thin brick tiles all spring and summer long :

1) Transform your Florida room


2) Edge your pool


3) Edging for your garden


4) Find your chill space


5) Fancy up a fire pit


6) Frame a garden bed


7) Lay a pretty pathway


8) Line your garden


9) Fancy up a chicken coop


10) Give your ride a brand new drive


What are your favorite DIY projects for spring and summer? 
How would you use Vintage Bricks thin brick tiles around your home?

Our thin brick tiles are cut from whole common bricks salvaged from our own demolition company. Vintage Bricks reclaimed tiles are half the weight of common bricks and as easy to install as regular tile.
www.VintageBricks.com


Wednesday, March 8, 2017

DIY Herringbone Brick Garden Path HOW TO GUIDE

The following tutorial is courtesy of our friends over at The Home Depot - as published in their e-newsletter.

In a simple afternoon you can create a beautiful simple DIY herringbone pathway from Vintage Bricks thin brick tiles. Using old bricks creates the look that your pathway has been there forever!

Herringbone Garden Brick Garden Path www.vintagebricks.com


Supply List:

  • Measuring tape
  • Vintage Bricks thin brick tiles
  • Gravel paver base
  • Paver sand
  • Wheelbarrow
  • Marking chalk or landscape paint
  • Tamper or 4- x 4-inch board, approximately 3 to 4 inches long
  • Flat-headed shovel
  • Broom


Step 1: Measure the length and width of your desired garden path to determine how many Vintage Bricks salvaged tiles you will need. Add 2 inches to your length to find the amount of gravel and sand you will need.
Step 2: Dig a 4-5" deep trench along your desired path, adding 2 inches to the width. Square the sides with a flat shovel.
Herringbone Garden Brick Garden Path www.vintagebricks.com

Step 3: Spread your gravel 1-2" deep along the path, tamp down the gravel
Herringbone Garden Brick Garden Path www.vintagebricks.com

Step 4: Repeat Step 3 with sand
Step 5: Lay your Vintage Bricks thin brick tiles in a herringbone pattern, adding and removing sand to keep brick tiles even. Tap bricks into sand with a 4x4" piece of wood
Herringbone Garden Brick Garden Path www.vintagebricks.com

Step 6: Pour sand over bricks fill the gaps
Herringbone Garden Brick Garden Path www.vintagebricks.com

Step 7: Fill in edges around the bricks with dirt and pieces of grass to create a natural look
Herringbone Garden Brick Garden Path www.vintagebricks.com

Step 8: Clean up any excess sand and enjoy your beautiful new old pathway.
Herringbone Garden Brick Garden Path www.vintagebricks.com


www.VintageBricks.com for 100% eco-friendly authentic old bricks cut into thin brick tiles. Brick tiles delivered to your door!
Herringbone Garden Brick Garden Path www.vintagebricks.com

Monday, February 13, 2017

The German Schmear / Smear : A How-To Guide

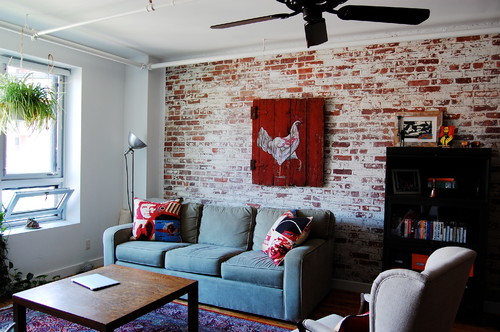
My Houzz: Textiles Charm an Open Brooklyn Loft
Do you have Vintage Bricks thin brick reclaimed tiles in your home and want to give them a fun new look?
Want to cover your boring dining room wall in German Schmear delight?
Look no further than the winning combination of our Vintage Bricks upcycled historic brick tiles paired with the "German schmear/smear " technique!

 Here's what you'll need: 

  1.  2 Buckets
  2.  Nearby hose 
  3. Sponges (look for concrete sponges) or grout float (like this one)
  4.  80 lb bag mortar mix 
  5. gloves (heavy duty)
  6. wire brush 
  7. inexpensive concrete mixer, like this 
  8. electric drill 


 To get started: 

Bucket 1 : Clean water
Bucket 2: Mortar and water. It should be soupy but not too runny, like batter. More mortar than water. Mix together with your mixer

 Wet the surface area of the bricks that you are working with, apply your mortar to the bricks with your sponge while they are still wet, in an upward motion.

Use the wire brush to wipe away any bricks that you want to expose, to create your own unique look. Every ten minutes or so rinse your sponge, changing your water bucket as needed.

 Your mortar will begin to dry and turn the correct color within a few hours. It will appear darker at first and lighten up as it dries. The mortar takes a few days to officially "cure".

To purchase reclaimed thin brick tiles for indoor and outdoor use on fireplaces, kitchen backsplashes, floors, patios, you name it, head on over to www.VintageBricks.com 

My Houzz: Textiles Charm an Open Brooklyn Loft
Hanover West
Credit : Source


© Reclaimed Brick Tile Blog
Maira Gall